
Table of Contents
About Moong Dal Chilla.
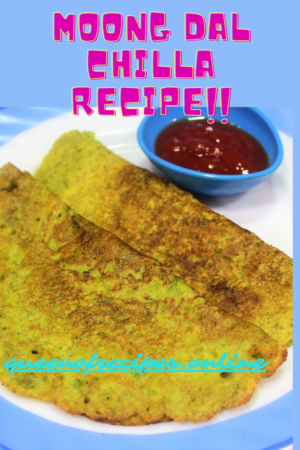
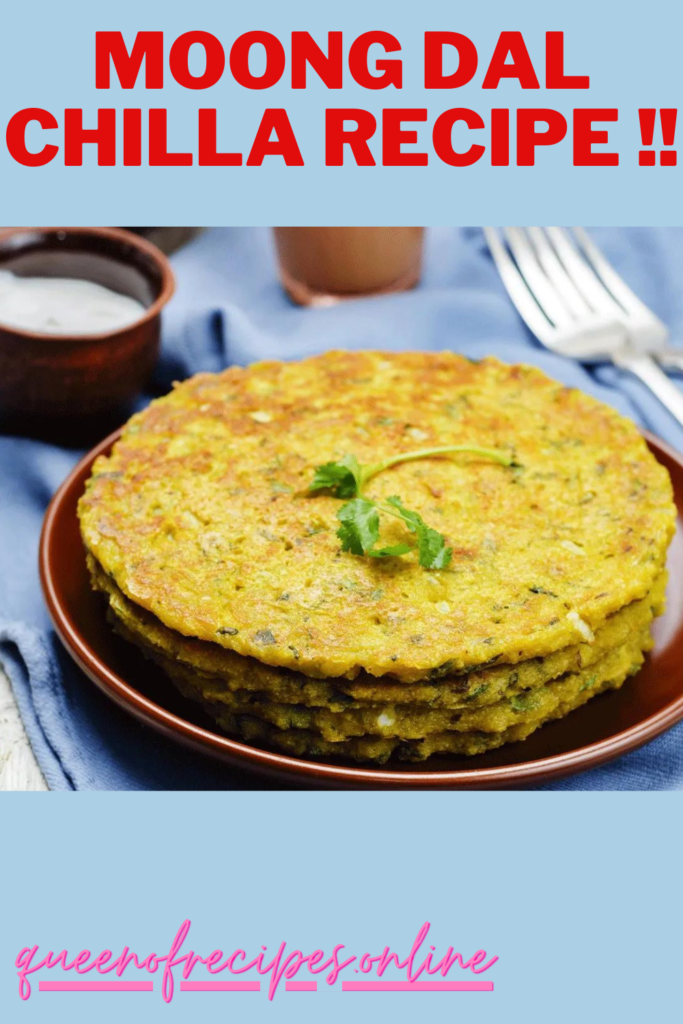
Moong Dal Chilla, a versatile and nutritious Indian dish, showcases the delicious potential of split yellow moong lentils. These savory crepes, also known as “cheela” or “puda,” are a staple of Indian cuisine and offer a delectable way to incorporate protein-rich moong dal into your diet. With a delicate texture and a myriad of filling options, Moong Dal Chilla caters to various palates and dietary preferences. Whether enjoyed as a wholesome breakfast, light lunch, or even a snack, these crepes are known for their ease of preparation, making them a go-to option for a quick and satisfying meal. In this introduction, we delve into the charm and adaptability of Moong Dal Chilla as a delightful addition to Indian culinary traditions.
Here’s a step-by-step guide on how to make Moong Dal Chilla at home:
Ingredients for making Moong Dal Chilla:
- 1 cup split yellow moong dal (lentils), soaked for 2-3 hours
- 1 small onion, finely chopped
- 1 small tomato, finely chopped
- 1-2 green chilies, finely chopped
- 1/4 cup chopped fresh coriander leaves
- 1/2 teaspoon cumin seeds
- A pinch of asafoetida (hing)
- Salt to taste
- Oil or ghee for cooking
Instructions for making Moong Dal Chilla:
- Prepare the Batter:
- Drain and rinse the soaked moong dal. Blend it in a mixer or blender to create a smooth batter. Add a little water if needed, but keep the batter thick.
- Add Spices and Flavor:
- Transfer the batter to a mixing bowl. Add cumin seeds, asafoetida, and salt. Mix well to incorporate the spices.
- Create the Filling:
- In a separate bowl, combine chopped onion, tomato, green chilies, and fresh coriander leaves. This will be the filling for the chilla.
- Assemble the Chilla:
- Heat a non-stick skillet or griddle over medium heat. Spread a few drops of oil or ghee to grease the surface.
- Pour a ladleful of the moong dal batter onto the center of the skillet. Using the back of the ladle, gently spread the batter in a circular motion to form a thin crepe.
- Add the Filling:
- Immediately after spreading the batter, sprinkle a portion of the onion-tomato filling over the chilla.
- Cooking the Chilla:
- Drizzle a little oil or ghee around the edges of the chilla. Allow it to cook until the bottom becomes golden and crisp.
- Flip and Cook:
- Carefully flip the chilla using a spatula. Cook the other side until it turns golden and the filling is cooked.
- Serve Hot:
- Transfer the cooked Moong Dal Chilla onto a serving plate. Serve it hot with green chutney, yogurt, or any dipping sauce of your choice.
- Repeat the Process:
- Repeat the process with the remaining batter and filling to make more chillas.
- Variations:
- Get creative with fillings by adding grated cheese, paneer, chopped spinach, or cooked vegetables of your choice.
Moong Dal Chilla is a delightful and wholesome dish that can be enjoyed for breakfast, lunch, or as a snack. Experiment with fillings and toppings to tailor it to your taste preferences.
Nutritional Value for Moong Dal Chilla.
The nutritional value of Moong Dal Chilla can vary based on the specific recipe and ingredients used. Here’s an approximate breakdown for a basic Moong Dal Chilla (per chilla):
Nutritional Values for Basic Moong Dal Chilla (Per Chilla):
- Calories: Approximately 150-180 kcal
- Carbohydrates: Around 25-30 grams
- Protein: About 8-10 grams
- Fat: Approximately 2-4 grams
- Saturated Fat: Around 0.5-1 gram
- Monounsaturated Fat: Approximately 1-2 grams
- Polyunsaturated Fat: About 0.5 gram
- Fiber: Around 3-4 grams
- Sugar: Approximately 2-3 grams (from natural sources)
- Sodium: Varies based on salt content
Please note that these values are approximate and can vary based on factors such as the size of the chilla, the amount of oil or ghee used for cooking, and any additional ingredients or fillings. Moong Dal Chilla is a nutritious dish that provides a good balance of protein, carbohydrates, and dietary fiber. It’s a wholesome option for those looking for a protein-rich meal or snack.
Health Benefits of Moong Dal Chilla.
Moong Dal Chilla offers a range of health benefits, making it a nutritious and wholesome choice:
1. Rich in Protein: Moong dal is a great source of plant-based protein, essential for muscle repair, growth, and overall body functions. Incorporating protein in your diet helps maintain energy levels and supports healthy metabolism.
2. Nutrient-Dense: Moong dal is packed with essential nutrients like vitamins (B-complex vitamins), minerals (iron, magnesium, potassium), and dietary fiber. These contribute to overall well-being and promote various bodily functions.
3. Weight Management: The high protein and fiber content in Moong Dal Chilla can promote feelings of fullness and satiety, helping control appetite and contributing to weight management.
4. Digestive Health: The dietary fiber in moong dal aids in digestion and promotes a healthy gut. It can help prevent constipation and maintain a balanced digestive system.
5. Low Glycemic Index: Moong Dal Chilla has a low glycemic index, which means it causes a gradual rise in blood sugar levels. This is beneficial for those managing diabetes or aiming to regulate blood sugar levels.
6. Heart Health: Moong dal is low in saturated fats and cholesterol, making it heart-friendly. It can contribute to maintaining healthy cholesterol levels and reducing the risk of heart disease.
7. Bone Health: The combination of moong dal and ingredients like cumin seeds provides essential minerals like calcium and magnesium, which are important for bone health.
8. Energy Boost: Moong Dal Chilla’s carbohydrate content provides a sustained release of energy, making it an excellent choice for a balanced breakfast or snack.
9. Versatile and Low Fat: Moong Dal Chilla can be prepared with minimal oil or ghee, making it a low-fat option. It’s also versatile, as you can customize fillings with vegetables for added vitamins and minerals.
10. Gluten-Free and Allergen-Friendly: Moong Dal Chilla is naturally gluten-free and suitable for those with gluten sensitivities or allergies.
Including Moong Dal Chilla in your diet can contribute to your overall nutrition, providing a wholesome combination of protein, fiber, and essential nutrients for a healthier lifestyle.

Tips and Tricks for making Moong Dal Chilla.
Here are some helpful tips and tricks to ensure your Moong Dal Chilla turns out delicious and perfect:
1. Soaking and Grinding:
- Soak the moong dal for 2-3 hours to ensure easy blending and a smoother batter.
- Blend the soaked dal with minimal water to achieve a thick batter. A smooth batter will result in better crepes.
2. Batter Consistency:
- The batter should be thick but spreadable. It shouldn’t be too runny; otherwise, it will be challenging to spread evenly on the skillet.
3. Seasoning and Spices:
- Incorporate spices like cumin seeds and asafoetida into the batter for added flavor and digestive benefits.
4. Non-Stick Pan:
- Use a good-quality non-stick skillet or griddle to ensure that the chilla doesn’t stick and cooks evenly.
5. Preheating the Pan:
- Preheat the skillet properly before making the chilla. A moderately hot pan helps in achieving the desired texture.
6. Spreading the Batter:
- Pour a ladleful of batter in the center of the skillet and quickly spread it in a circular motion using the back of the ladle. This helps in creating thin and even crepes.
7. Filling Placement:
- Add the filling immediately after spreading the batter to ensure it sticks to the chilla. Press the filling gently into the batter.
8. Cooking Time:
- Cook the chilla on medium heat to achieve a crispy texture. Once the edges start lifting, it’s ready to be flipped.
9. Flipping Carefully:
- Use a flat spatula to flip the chilla gently. The second side cooks faster, so keep an eye on it.
10. Oil or Ghee:
- Use a small amount of oil or ghee to cook the chilla. You can drizzle a little around the edges and a few drops on the top for crispiness.
11. Fillings and Variations:
- Experiment with various fillings like grated cheese, paneer, spinach, or leftover vegetables for diverse flavors.
12. Serve Fresh:
- Moong Dal Chilla is best enjoyed fresh and hot. Serve it immediately to relish the crispy texture.
13. Dipping Sauces:
- Pair Moong Dal Chilla with green chutney, yogurt, or a tangy tomato sauce for enhanced taste.
14. Practice and Patience:
- Making perfect chillas might take a bit of practice. Be patient and adjust the cooking technique as needed.
By following these tips, you’ll be able to create Moong Dal Chilla that’s flavorful, crispy, and a delightful addition to your meals!
Serving Suggestions for Moong Dal Chilla.
Here are some serving suggestions to complement your delicious Moong Dal Chilla:
1. Chutneys and Dips:
- Serve Moong Dal Chilla with a variety of chutneys like mint chutney, tamarind chutney, or coriander chutney. Yogurt-based dips, such as raita or yogurt mixed with spices, also make excellent accompaniments.
2. Pickles and Sauces:
- Pair the chilla with tangy mango pickle, spicy tomato sauce, or a zesty lemon pickle for an extra burst of flavor.
3. Vegetable Salad:
- Serve a fresh vegetable salad on the side to add crunch and freshness to your meal. A simple cucumber-tomato-onion salad with a dash of lemon juice and salt works well.
4. Curry Accompaniment:
- Enjoy Moong Dal Chilla with a mild curry, such as aloo curry or paneer curry, for a balanced and satisfying meal.
5. Herbal Teas or Drinks:
- Accompany your chilla with a cup of herbal tea, such as mint or ginger tea, or a refreshing drink like buttermilk.
6. Wraps or Rolls:
- Use Moong Dal Chilla as a wrap or roll by adding a filling of your choice, such as paneer, veggies, or cooked chicken. This turns the chilla into a complete meal.
7. Fruit Slices:
- Enjoy the chilla with slices of fresh seasonal fruits like oranges, cucumbers, or watermelon for a light and refreshing contrast.
8. Chopped Nuts:
- Sprinkle chopped nuts like almonds, cashews, or peanuts over the chilla for added texture and nutritional value.
9. Yogurt Garnish:
- Top the chilla with a dollop of yogurt and a sprinkle of chaat masala or roasted cumin powder for a delightful twist.
10. Avocado Smash:
- Mash ripe avocado and spread it over the chilla, adding a creamy and nutritious element to the dish.
These serving suggestions offer various ways to enjoy Moong Dal Chilla, enhancing its taste and nutritional value. Feel free to mix and match according to your preferences and create a well-rounded meal.
FAQs for Moong Dal Chilla.
Can I make Moong Dal Chilla without stuffing?
Absolutely! Moong Dal Chilla can be made without any stuffing. In fact, a plain Moong Dal Chilla without stuffing is a simple and delicious option. You can enjoy the natural flavors of the moong dal and the mild spices used in the batter. A plain chilla is versatile and can be served with various accompaniments like chutneys, dips, or sauces to enhance its taste. This variation is perfect for those looking for a quick and easy option or for those who prefer a lighter version of this popular Indian dish.
How do I prevent the chilla from sticking to the pan?
Preventing Moong Dal Chilla from sticking to the pan involves a few key steps:
1. Non-Stick Pan: Use a good-quality non-stick skillet or griddle. This significantly reduces the chances of the chilla sticking to the surface.
2. Proper Preheating: Ensure that the pan is properly preheated before pouring the batter. A moderately hot pan helps create a barrier between the chilla and the pan.
3. Light Greasing: Lightly grease the pan with a small amount of oil or ghee before pouring the batter. Use a paper towel or brush to evenly spread the oil.
4. Right Consistency: Make sure the batter is of the right consistency—not too thick or too runny. This helps in spreading the batter evenly on the pan without it clinging excessively.
By following these steps, you can create a smooth cooking surface and minimize the risk of Moong Dal Chilla sticking to the pan, resulting in perfectly cooked and easy-to-flip chillas.
Can I make Moong Dal Chilla in advance and reheat it?
While Moong Dal Chilla is best enjoyed fresh for its crispy texture, you can make them in advance and reheat them if needed. Store the cooked chillas in an airtight container with parchment paper between each layer to prevent sticking. When reheating, use a pan or microwave to warm them gently, which may slightly alter their texture. While they might not be as crisp as freshly made chillas, they can still be a convenient and tasty option when prepared ahead of time.